4 consigli essenziali per i possessori di MacBook Air
Il MacBook Air potrebbe essere il più grande laptop mai realizzato, è estremamente leggero, potente, ha una durata incredibile della batteria e in qualche modo racchiude tutto ciò in un pacchetto economico. Per ottenere il massimo da questo meraviglioso Mac, ti consigliamo di esaminare questi quattro (ben, tecnicamente sei) consigli essenziali, che trattano ciò che raccomando abitualmente per ogni proprietario di MacBook Air.

Sia che tu abbia appena acquisito un Air nuovo di zecca per la prima volta o che tu sia un proprietario da molto tempo di Air, otterrai un display migliore, più spazio sullo schermo, migliori prestazioni della batteria e una migliore gestione della capacità di archiviazione limitata offerta attraverso le unità flash superveloci.
1: controlla il pannello e calibra i colori dello schermo
Prenditi un momento per controllare il produttore del display interno di MacBook Air e poi per calibrare il display se hai un pannello LG. Questo non significa che alcuni pannelli siano inferiori agli altri, sono tutti eccellenti, è solo una questione del profilo colore predefinito usato. I modelli Air con display Samsung sembrano adattarsi meglio al profilo colore predefinito rispetto ai modelli Air forniti con i pannelli LG, che appaiono significativamente migliori dopo aver eseguito una calibrazione.
Il modo più rapido per verificare il produttore del pannello è tramite Terminale, disponibile in / Applicazioni / Utility. Avvia Terminal e incolla quanto segue nella riga di comando:
ioreg -lw0 | grep IODisplayEDID | sed "/[^<]* If you see something prefixed with “LP” reported back, you have a display panel that should be manually calibrated to look it's best. Open System Preferences, found in the Apple menu, and choose “Displays” Choose the “Colors” tab and click “Calibrate”, then check the box for “Expert Mode” to get the best results The effect is very hard to demonstrate in screen shots because images don't carry display profiles, you really need to check this yourself and run through calibration (or use a pre-made Air color profile for LG displays) to see the remarkable difference that is possible. The gist is that after a proper calibration, colors on the MacBook Air display will appear brighter and contrast will increase, making the display look significantly improved.  Display calibration only takes a minute or two with “Expert Mode”, just be sure to calibrate colors in a neutrally lit environment with the brightness temporarily turned up to get the best results. 2: Maximize Screen Usage with Full Screen Apps & Dock Hiding Taking apps full screen makes the best of the smaller screen sizes of the MacBook Air, which is particularly important on the 11″ model, but still has nice benefits on the 13″ Air. Just toggling the Full Screen button in the corner of most apps is all it takes, or set a keyboard shortcut for this purpose if that's your preference.
  When not working full screen, having the Dock automatically hide itself is another great way to save some screen real estate. All that's necessary to achieve that is to hit Command+Option+D, and the Dock will automatically disappear and reappear again when you hover the cursor near it. Or you can toggle it yourself in the Dock settings.
  These are the two simplest tricks to get the best use of a smaller display, but we've covered more tips for being productive with small screens before if you're interested in some more advanced solutions. 3: Learn the 2 Simplest Tricks to Maximize Battery Life
  The MacBook Air gets stellar battery life on it's own, but to get the absolute most battery life out of your Air you'll want to focus on two things: Manage screen brightness at a reasonable level, the best battery life comes under 65% brightness Keep actively running applications to a minimum when aiming for battery longevity For best results, go with 50% (or less) screen brightness, and quit out of every single app that isn't necessary for the task at hand. A simple trick for the latter is to use a DIY quit-all function and then selectively launch a single app or two that is needed to get the job done, keeping background activity to a minimum. Want even better battery life? follow some other tips to further boost that battery, relevant to all MacBook's be them an Air, Pro, Retina, or whatever else you're rocking. And don't forget to upgrade to OS X Mavericks when possible, because it has some serious battery enhancing features. 4: Rely on Cheap External Storage for Media & Backups Perhaps the only weakness of the MacBook Air is the size of onboard SSD storage, which can be inadequate when compared to laptops that use old fashioned hard drives. Fortunately, cheap external storage is now the norm, and it's very easy to augment the lightning fast built-in drive with affordable and portable external solutions. Owners of the 13″ model should spend a bit to grab a sizable SD card
  with decent storage capacity, which tucks nicely into the card reader on the side and adds a lot of storage capacity for a tiny price tag, making it a great place to store media files, movies, photos, downloads, and other stuff that doesn't necessarily need to be on the primary drive. Unfortunately, 11″ Air owners don't get the SD card option, but an external micro USB Flash drive
  can make a decent compromise and still remain small enough to not be a nuisance even if it does stick out of a USB slot.
  Speaking of external storage, grab a large external portable drive
  and partition it to serve as both a general use media drive and Time Machine destination. This allows you to share a single drive for backups and file storage and avoid a tangle of cables whether you're on the go or at a desk.
ioreg -lw0 | grep IODisplayEDID | sed "/[^<]* If you see something prefixed with “LP” reported back, you have a display panel that should be manually calibrated to look it's best. Open System Preferences, found in the Apple menu, and choose “Displays” Choose the “Colors” tab and click “Calibrate”, then check the box for “Expert Mode” to get the best results The effect is very hard to demonstrate in screen shots because images don't carry display profiles, you really need to check this yourself and run through calibration (or use a pre-made Air color profile for LG displays) to see the remarkable difference that is possible. The gist is that after a proper calibration, colors on the MacBook Air display will appear brighter and contrast will increase, making the display look significantly improved. Display calibration only takes a minute or two with “Expert Mode”, just be sure to calibrate colors in a neutrally lit environment with the brightness temporarily turned up to get the best results. 2: Maximize Screen Usage with Full Screen Apps & Dock Hiding Taking apps full screen makes the best of the smaller screen sizes of the MacBook Air, which is particularly important on the 11″ model, but still has nice benefits on the 13″ Air. Just toggling the Full Screen button in the corner of most apps is all it takes, or set a keyboard shortcut for this purpose if that's your preference. When not working full screen, having the Dock automatically hide itself is another great way to save some screen real estate. All that's necessary to achieve that is to hit Command+Option+D, and the Dock will automatically disappear and reappear again when you hover the cursor near it. Or you can toggle it yourself in the Dock settings. These are the two simplest tricks to get the best use of a smaller display, but we've covered more tips for being productive with small screens before if you're interested in some more advanced solutions. 3: Learn the 2 Simplest Tricks to Maximize Battery Life The MacBook Air gets stellar battery life on it's own, but to get the absolute most battery life out of your Air you'll want to focus on two things: Manage screen brightness at a reasonable level, the best battery life comes under 65% brightness Keep actively running applications to a minimum when aiming for battery longevity For best results, go with 50% (or less) screen brightness, and quit out of every single app that isn't necessary for the task at hand. A simple trick for the latter is to use a DIY quit-all function and then selectively launch a single app or two that is needed to get the job done, keeping background activity to a minimum. Want even better battery life? follow some other tips to further boost that battery, relevant to all MacBook's be them an Air, Pro, Retina, or whatever else you're rocking. And don't forget to upgrade to OS X Mavericks when possible, because it has some serious battery enhancing features. 4: Rely on Cheap External Storage for Media & Backups Perhaps the only weakness of the MacBook Air is the size of onboard SSD storage, which can be inadequate when compared to laptops that use old fashioned hard drives. Fortunately, cheap external storage is now the norm, and it's very easy to augment the lightning fast built-in drive with affordable and portable external solutions. Owners of the 13″ model should spend a bit to grab a sizable SD card with decent storage capacity, which tucks nicely into the card reader on the side and adds a lot of storage capacity for a tiny price tag, making it a great place to store media files, movies, photos, downloads, and other stuff that doesn't necessarily need to be on the primary drive. Unfortunately, 11″ Air owners don't get the SD card option, but an external micro USB Flash drive can make a decent compromise and still remain small enough to not be a nuisance even if it does stick out of a USB slot. Speaking of external storage, grab a large external portable drive and partition it to serve as both a general use media drive and Time Machine destination. This allows you to share a single drive for backups and file storage and avoid a tangle of cables whether you're on the go or at a desk.
ioreg -lw0 | grep IODisplayEDID | sed "/[^<]* If you see something prefixed with “LP” reported back, you have a display panel that should be manually calibrated to look it's best. Open System Preferences, found in the Apple menu, and choose “Displays” Choose the “Colors” tab and click “Calibrate”, then check the box for “Expert Mode” to get the best results The effect is very hard to demonstrate in screen shots because images don't carry display profiles, you really need to check this yourself and run through calibration (or use a pre-made Air color profile for LG displays) to see the remarkable difference that is possible. The gist is that after a proper calibration, colors on the MacBook Air display will appear brighter and contrast will increase, making the display look significantly improved. Display calibration only takes a minute or two with “Expert Mode”, just be sure to calibrate colors in a neutrally lit environment with the brightness temporarily turned up to get the best results. 2: Maximize Screen Usage with Full Screen Apps & Dock Hiding Taking apps full screen makes the best of the smaller screen sizes of the MacBook Air, which is particularly important on the 11″ model, but still has nice benefits on the 13″ Air. Just toggling the Full Screen button in the corner of most apps is all it takes, or set a keyboard shortcut for this purpose if that's your preference. When not working full screen, having the Dock automatically hide itself is another great way to save some screen real estate. All that's necessary to achieve that is to hit Command+Option+D, and the Dock will automatically disappear and reappear again when you hover the cursor near it. Or you can toggle it yourself in the Dock settings. These are the two simplest tricks to get the best use of a smaller display, but we've covered more tips for being productive with small screens before if you're interested in some more advanced solutions. 3: Learn the 2 Simplest Tricks to Maximize Battery Life The MacBook Air gets stellar battery life on it's own, but to get the absolute most battery life out of your Air you'll want to focus on two things: Manage screen brightness at a reasonable level, the best battery life comes under 65% brightness Keep actively running applications to a minimum when aiming for battery longevity For best results, go with 50% (or less) screen brightness, and quit out of every single app that isn't necessary for the task at hand. A simple trick for the latter is to use a DIY quit-all function and then selectively launch a single app or two that is needed to get the job done, keeping background activity to a minimum. Want even better battery life? follow some other tips to further boost that battery, relevant to all MacBook's be them an Air, Pro, Retina, or whatever else you're rocking. And don't forget to upgrade to OS X Mavericks when possible, because it has some serious battery enhancing features. 4: Rely on Cheap External Storage for Media & Backups Perhaps the only weakness of the MacBook Air is the size of onboard SSD storage, which can be inadequate when compared to laptops that use old fashioned hard drives. Fortunately, cheap external storage is now the norm, and it's very easy to augment the lightning fast built-in drive with affordable and portable external solutions. Owners of the 13″ model should spend a bit to grab a sizable SD card with decent storage capacity, which tucks nicely into the card reader on the side and adds a lot of storage capacity for a tiny price tag, making it a great place to store media files, movies, photos, downloads, and other stuff that doesn't necessarily need to be on the primary drive. Unfortunately, 11″ Air owners don't get the SD card option, but an external micro USB Flash drive can make a decent compromise and still remain small enough to not be a nuisance even if it does stick out of a USB slot. Speaking of external storage, grab a large external portable drive and partition it to serve as both a general use media drive and Time Machine destination. This allows you to share a single drive for backups and file storage and avoid a tangle of cables whether you're on the go or at a desk.ioreg -lw0 | grep IODisplayEDID | sed "/[^<]* If you see something prefixed with “LP” reported back, you have a display panel that should be manually calibrated to look it's best. Open System Preferences, found in the Apple menu, and choose “Displays” Choose the “Colors” tab and click “Calibrate”, then check the box for “Expert Mode” to get the best results The effect is very hard to demonstrate in screen shots because images don't carry display profiles, you really need to check this yourself and run through calibration (or use a pre-made Air color profile for LG displays) to see the remarkable difference that is possible. The gist is that after a proper calibration, colors on the MacBook Air display will appear brighter and contrast will increase, making the display look significantly improved. Display calibration only takes a minute or two with “Expert Mode”, just be sure to calibrate colors in a neutrally lit environment with the brightness temporarily turned up to get the best results. 2: Maximize Screen Usage with Full Screen Apps & Dock Hiding Taking apps full screen makes the best of the smaller screen sizes of the MacBook Air, which is particularly important on the 11″ model, but still has nice benefits on the 13″ Air. Just toggling the Full Screen button in the corner of most apps is all it takes, or set a keyboard shortcut for this purpose if that's your preference. When not working full screen, having the Dock automatically hide itself is another great way to save some screen real estate. All that's necessary to achieve that is to hit Command+Option+D, and the Dock will automatically disappear and reappear again when you hover the cursor near it. Or you can toggle it yourself in the Dock settings. These are the two simplest tricks to get the best use of a smaller display, but we've covered more tips for being productive with small screens before if you're interested in some more advanced solutions. 3: Learn the 2 Simplest Tricks to Maximize Battery Life The MacBook Air gets stellar battery life on it's own, but to get the absolute most battery life out of your Air you'll want to focus on two things: Manage screen brightness at a reasonable level, the best battery life comes under 65% brightness Keep actively running applications to a minimum when aiming for battery longevity For best results, go with 50% (or less) screen brightness, and quit out of every single app that isn't necessary for the task at hand. A simple trick for the latter is to use a DIY quit-all function and then selectively launch a single app or two that is needed to get the job done, keeping background activity to a minimum. Want even better battery life? follow some other tips to further boost that battery, relevant to all MacBook's be them an Air, Pro, Retina, or whatever else you're rocking. And don't forget to upgrade to OS X Mavericks when possible, because it has some serious battery enhancing features. 4: Rely on Cheap External Storage for Media & Backups Perhaps the only weakness of the MacBook Air is the size of onboard SSD storage, which can be inadequate when compared to laptops that use old fashioned hard drives. Fortunately, cheap external storage is now the norm, and it's very easy to augment the lightning fast built-in drive with affordable and portable external solutions. Owners of the 13″ model should spend a bit to grab a sizable SD card with decent storage capacity, which tucks nicely into the card reader on the side and adds a lot of storage capacity for a tiny price tag, making it a great place to store media files, movies, photos, downloads, and other stuff that doesn't necessarily need to be on the primary drive. Unfortunately, 11″ Air owners don't get the SD card option, but an external micro USB Flash drive can make a decent compromise and still remain small enough to not be a nuisance even if it does stick out of a USB slot. Speaking of external storage, grab a large external portable drive and partition it to serve as both a general use media drive and Time Machine destination. This allows you to share a single drive for backups and file storage and avoid a tangle of cables whether you're on the go or at a desk.
ioreg -lw0 | grep IODisplayEDID | sed "/[^<]* If you see something prefixed with “LP” reported back, you have a display panel that should be manually calibrated to look it's best. Open System Preferences, found in the Apple menu, and choose “Displays” Choose the “Colors” tab and click “Calibrate”, then check the box for “Expert Mode” to get the best results The effect is very hard to demonstrate in screen shots because images don't carry display profiles, you really need to check this yourself and run through calibration (or use a pre-made Air color profile for LG displays) to see the remarkable difference that is possible. The gist is that after a proper calibration, colors on the MacBook Air display will appear brighter and contrast will increase, making the display look significantly improved. Display calibration only takes a minute or two with “Expert Mode”, just be sure to calibrate colors in a neutrally lit environment with the brightness temporarily turned up to get the best results. 2: Maximize Screen Usage with Full Screen Apps & Dock Hiding Taking apps full screen makes the best of the smaller screen sizes of the MacBook Air, which is particularly important on the 11″ model, but still has nice benefits on the 13″ Air. Just toggling the Full Screen button in the corner of most apps is all it takes, or set a keyboard shortcut for this purpose if that's your preference. When not working full screen, having the Dock automatically hide itself is another great way to save some screen real estate. All that's necessary to achieve that is to hit Command+Option+D, and the Dock will automatically disappear and reappear again when you hover the cursor near it. Or you can toggle it yourself in the Dock settings. These are the two simplest tricks to get the best use of a smaller display, but we've covered more tips for being productive with small screens before if you're interested in some more advanced solutions. 3: Learn the 2 Simplest Tricks to Maximize Battery Life The MacBook Air gets stellar battery life on it's own, but to get the absolute most battery life out of your Air you'll want to focus on two things: Manage screen brightness at a reasonable level, the best battery life comes under 65% brightness Keep actively running applications to a minimum when aiming for battery longevity For best results, go with 50% (or less) screen brightness, and quit out of every single app that isn't necessary for the task at hand. A simple trick for the latter is to use a DIY quit-all function and then selectively launch a single app or two that is needed to get the job done, keeping background activity to a minimum. Want even better battery life? follow some other tips to further boost that battery, relevant to all MacBook's be them an Air, Pro, Retina, or whatever else you're rocking. And don't forget to upgrade to OS X Mavericks when possible, because it has some serious battery enhancing features. 4: Rely on Cheap External Storage for Media & Backups Perhaps the only weakness of the MacBook Air is the size of onboard SSD storage, which can be inadequate when compared to laptops that use old fashioned hard drives. Fortunately, cheap external storage is now the norm, and it's very easy to augment the lightning fast built-in drive with affordable and portable external solutions. Owners of the 13″ model should spend a bit to grab a sizable SD card with decent storage capacity, which tucks nicely into the card reader on the side and adds a lot of storage capacity for a tiny price tag, making it a great place to store media files, movies, photos, downloads, and other stuff that doesn't necessarily need to be on the primary drive. Unfortunately, 11″ Air owners don't get the SD card option, but an external micro USB Flash drive can make a decent compromise and still remain small enough to not be a nuisance even if it does stick out of a USB slot. Speaking of external storage, grab a large external portable drive and partition it to serve as both a general use media drive and Time Machine destination. This allows you to share a single drive for backups and file storage and avoid a tangle of cables whether you're on the go or at a desk.
ioreg -lw0 | grep IODisplayEDID | sed "/[^<]* If you see something prefixed with “LP” reported back, you have a display panel that should be manually calibrated to look it's best. Open System Preferences, found in the Apple menu, and choose “Displays” Choose the “Colors” tab and click “Calibrate”, then check the box for “Expert Mode” to get the best results The effect is very hard to demonstrate in screen shots because images don't carry display profiles, you really need to check this yourself and run through calibration (or use a pre-made Air color profile for LG displays) to see the remarkable difference that is possible. The gist is that after a proper calibration, colors on the MacBook Air display will appear brighter and contrast will increase, making the display look significantly improved. Display calibration only takes a minute or two with “Expert Mode”, just be sure to calibrate colors in a neutrally lit environment with the brightness temporarily turned up to get the best results. 2: Maximize Screen Usage with Full Screen Apps & Dock Hiding Taking apps full screen makes the best of the smaller screen sizes of the MacBook Air, which is particularly important on the 11″ model, but still has nice benefits on the 13″ Air. Just toggling the Full Screen button in the corner of most apps is all it takes, or set a keyboard shortcut for this purpose if that's your preference. When not working full screen, having the Dock automatically hide itself is another great way to save some screen real estate. All that's necessary to achieve that is to hit Command+Option+D, and the Dock will automatically disappear and reappear again when you hover the cursor near it. Or you can toggle it yourself in the Dock settings. These are the two simplest tricks to get the best use of a smaller display, but we've covered more tips for being productive with small screens before if you're interested in some more advanced solutions. 3: Learn the 2 Simplest Tricks to Maximize Battery Life The MacBook Air gets stellar battery life on it's own, but to get the absolute most battery life out of your Air you'll want to focus on two things: Manage screen brightness at a reasonable level, the best battery life comes under 65% brightness Keep actively running applications to a minimum when aiming for battery longevity For best results, go with 50% (or less) screen brightness, and quit out of every single app that isn't necessary for the task at hand. A simple trick for the latter is to use a DIY quit-all function and then selectively launch a single app or two that is needed to get the job done, keeping background activity to a minimum. Want even better battery life? follow some other tips to further boost that battery, relevant to all MacBook's be them an Air, Pro, Retina, or whatever else you're rocking. And don't forget to upgrade to OS X Mavericks when possible, because it has some serious battery enhancing features. 4: Rely on Cheap External Storage for Media & Backups Perhaps the only weakness of the MacBook Air is the size of onboard SSD storage, which can be inadequate when compared to laptops that use old fashioned hard drives. Fortunately, cheap external storage is now the norm, and it's very easy to augment the lightning fast built-in drive with affordable and portable external solutions. Owners of the 13″ model should spend a bit to grab a sizable SD card with decent storage capacity, which tucks nicely into the card reader on the side and adds a lot of storage capacity for a tiny price tag, making it a great place to store media files, movies, photos, downloads, and other stuff that doesn't necessarily need to be on the primary drive. Unfortunately, 11″ Air owners don't get the SD card option, but an external micro USB Flash drive can make a decent compromise and still remain small enough to not be a nuisance even if it does stick out of a USB slot. Speaking of external storage, grab a large external portable drive and partition it to serve as both a general use media drive and Time Machine destination. This allows you to share a single drive for backups and file storage and avoid a tangle of cables whether you're on the go or at a desk.
ioreg -lw0 | grep IODisplayEDID | sed "/[^<]* If you see something prefixed with “LP” reported back, you have a display panel that should be manually calibrated to look it's best. Open System Preferences, found in the Apple menu, and choose “Displays” Choose the “Colors” tab and click “Calibrate”, then check the box for “Expert Mode” to get the best results The effect is very hard to demonstrate in screen shots because images don't carry display profiles, you really need to check this yourself and run through calibration (or use a pre-made Air color profile for LG displays) to see the remarkable difference that is possible. The gist is that after a proper calibration, colors on the MacBook Air display will appear brighter and contrast will increase, making the display look significantly improved. Display calibration only takes a minute or two with “Expert Mode”, just be sure to calibrate colors in a neutrally lit environment with the brightness temporarily turned up to get the best results. 2: Maximize Screen Usage with Full Screen Apps & Dock Hiding Taking apps full screen makes the best of the smaller screen sizes of the MacBook Air, which is particularly important on the 11″ model, but still has nice benefits on the 13″ Air. Just toggling the Full Screen button in the corner of most apps is all it takes, or set a keyboard shortcut for this purpose if that's your preference. When not working full screen, having the Dock automatically hide itself is another great way to save some screen real estate. All that's necessary to achieve that is to hit Command+Option+D, and the Dock will automatically disappear and reappear again when you hover the cursor near it. Or you can toggle it yourself in the Dock settings. These are the two simplest tricks to get the best use of a smaller display, but we've covered more tips for being productive with small screens before if you're interested in some more advanced solutions. 3: Learn the 2 Simplest Tricks to Maximize Battery Life The MacBook Air gets stellar battery life on it's own, but to get the absolute most battery life out of your Air you'll want to focus on two things: Manage screen brightness at a reasonable level, the best battery life comes under 65% brightness Keep actively running applications to a minimum when aiming for battery longevity For best results, go with 50% (or less) screen brightness, and quit out of every single app that isn't necessary for the task at hand. A simple trick for the latter is to use a DIY quit-all function and then selectively launch a single app or two that is needed to get the job done, keeping background activity to a minimum. Want even better battery life? follow some other tips to further boost that battery, relevant to all MacBook's be them an Air, Pro, Retina, or whatever else you're rocking. And don't forget to upgrade to OS X Mavericks when possible, because it has some serious battery enhancing features. 4: Rely on Cheap External Storage for Media & Backups Perhaps the only weakness of the MacBook Air is the size of onboard SSD storage, which can be inadequate when compared to laptops that use old fashioned hard drives. Fortunately, cheap external storage is now the norm, and it's very easy to augment the lightning fast built-in drive with affordable and portable external solutions. Owners of the 13″ model should spend a bit to grab a sizable SD card with decent storage capacity, which tucks nicely into the card reader on the side and adds a lot of storage capacity for a tiny price tag, making it a great place to store media files, movies, photos, downloads, and other stuff that doesn't necessarily need to be on the primary drive. Unfortunately, 11″ Air owners don't get the SD card option, but an external micro USB Flash drive can make a decent compromise and still remain small enough to not be a nuisance even if it does stick out of a USB slot. Speaking of external storage, grab a large external portable drive and partition it to serve as both a general use media drive and Time Machine destination. This allows you to share a single drive for backups and file storage and avoid a tangle of cables whether you're on the go or at a desk.
ioreg -lw0 | grep IODisplayEDID | sed "/[^<]* If you see something prefixed with “LP” reported back, you have a display panel that should be manually calibrated to look it's best. Open System Preferences, found in the Apple menu, and choose “Displays” Choose the “Colors” tab and click “Calibrate”, then check the box for “Expert Mode” to get the best results The effect is very hard to demonstrate in screen shots because images don't carry display profiles, you really need to check this yourself and run through calibration (or use a pre-made Air color profile for LG displays) to see the remarkable difference that is possible. The gist is that after a proper calibration, colors on the MacBook Air display will appear brighter and contrast will increase, making the display look significantly improved. Display calibration only takes a minute or two with “Expert Mode”, just be sure to calibrate colors in a neutrally lit environment with the brightness temporarily turned up to get the best results. 2: Maximize Screen Usage with Full Screen Apps & Dock Hiding Taking apps full screen makes the best of the smaller screen sizes of the MacBook Air, which is particularly important on the 11″ model, but still has nice benefits on the 13″ Air. Just toggling the Full Screen button in the corner of most apps is all it takes, or set a keyboard shortcut for this purpose if that's your preference. When not working full screen, having the Dock automatically hide itself is another great way to save some screen real estate. All that's necessary to achieve that is to hit Command+Option+D, and the Dock will automatically disappear and reappear again when you hover the cursor near it. Or you can toggle it yourself in the Dock settings. These are the two simplest tricks to get the best use of a smaller display, but we've covered more tips for being productive with small screens before if you're interested in some more advanced solutions. 3: Learn the 2 Simplest Tricks to Maximize Battery Life The MacBook Air gets stellar battery life on it's own, but to get the absolute most battery life out of your Air you'll want to focus on two things: Manage screen brightness at a reasonable level, the best battery life comes under 65% brightness Keep actively running applications to a minimum when aiming for battery longevity For best results, go with 50% (or less) screen brightness, and quit out of every single app that isn't necessary for the task at hand. A simple trick for the latter is to use a DIY quit-all function and then selectively launch a single app or two that is needed to get the job done, keeping background activity to a minimum. Want even better battery life? follow some other tips to further boost that battery, relevant to all MacBook's be them an Air, Pro, Retina, or whatever else you're rocking. And don't forget to upgrade to OS X Mavericks when possible, because it has some serious battery enhancing features. 4: Rely on Cheap External Storage for Media & Backups Perhaps the only weakness of the MacBook Air is the size of onboard SSD storage, which can be inadequate when compared to laptops that use old fashioned hard drives. Fortunately, cheap external storage is now the norm, and it's very easy to augment the lightning fast built-in drive with affordable and portable external solutions. Owners of the 13″ model should spend a bit to grab a sizable SD card with decent storage capacity, which tucks nicely into the card reader on the side and adds a lot of storage capacity for a tiny price tag, making it a great place to store media files, movies, photos, downloads, and other stuff that doesn't necessarily need to be on the primary drive. Unfortunately, 11″ Air owners don't get the SD card option, but an external micro USB Flash drive can make a decent compromise and still remain small enough to not be a nuisance even if it does stick out of a USB slot. Speaking of external storage, grab a large external portable drive and partition it to serve as both a general use media drive and Time Machine destination. This allows you to share a single drive for backups and file storage and avoid a tangle of cables whether you're on the go or at a desk.
Display calibration only takes a minute or two with “Expert Mode”, just be sure to calibrate colors in a neutrally lit environment with the brightness temporarily turned up to get the best results. 2: Maximize Screen Usage with Full Screen Apps & Dock Hiding Taking apps full screen makes the best of the smaller screen sizes of the MacBook Air, which is particularly important on the 11″ model, but still has nice benefits on the 13″ Air. Just toggling the Full Screen button in the corner of most apps is all it takes, or set a keyboard shortcut for this purpose if that's your preference. When not working full screen, having the Dock automatically hide itself is another great way to save some screen real estate. All that's necessary to achieve that is to hit Command+Option+D, and the Dock will automatically disappear and reappear again when you hover the cursor near it. Or you can toggle it yourself in the Dock settings. These are the two simplest tricks to get the best use of a smaller display, but we've covered more tips for being productive with small screens before if you're interested in some more advanced solutions. 3: Learn the 2 Simplest Tricks to Maximize Battery Life The MacBook Air gets stellar battery life on it's own, but to get the absolute most battery life out of your Air you'll want to focus on two things: Manage screen brightness at a reasonable level, the best battery life comes under 65% brightness Keep actively running applications to a minimum when aiming for battery longevity For best results, go with 50% (or less) screen brightness, and quit out of every single app that isn't necessary for the task at hand. A simple trick for the latter is to use a DIY quit-all function and then selectively launch a single app or two that is needed to get the job done, keeping background activity to a minimum. Want even better battery life? follow some other tips to further boost that battery, relevant to all MacBook's be them an Air, Pro, Retina, or whatever else you're rocking. And don't forget to upgrade to OS X Mavericks when possible, because it has some serious battery enhancing features. 4: Rely on Cheap External Storage for Media & Backups Perhaps the only weakness of the MacBook Air is the size of onboard SSD storage, which can be inadequate when compared to laptops that use old fashioned hard drives. Fortunately, cheap external storage is now the norm, and it's very easy to augment the lightning fast built-in drive with affordable and portable external solutions. Owners of the 13″ model should spend a bit to grab a sizable SD card with decent storage capacity, which tucks nicely into the card reader on the side and adds a lot of storage capacity for a tiny price tag, making it a great place to store media files, movies, photos, downloads, and other stuff that doesn't necessarily need to be on the primary drive. Unfortunately, 11″ Air owners don't get the SD card option, but an external micro USB Flash drive can make a decent compromise and still remain small enough to not be a nuisance even if it does stick out of a USB slot. Speaking of external storage, grab a large external portable drive and partition it to serve as both a general use media drive and Time Machine destination. This allows you to share a single drive for backups and file storage and avoid a tangle of cables whether you're on the go or at a desk.ioreg -lw0 | grep IODisplayEDID | sed "/[^<]* If you see something prefixed with “LP” reported back, you have a display panel that should be manually calibrated to look it's best. Open System Preferences, found in the Apple menu, and choose “Displays” Choose the “Colors” tab and click “Calibrate”, then check the box for “Expert Mode” to get the best results The effect is very hard to demonstrate in screen shots because images don't carry display profiles, you really need to check this yourself and run through calibration (or use a pre-made Air color profile for LG displays) to see the remarkable difference that is possible. The gist is that after a proper calibration, colors on the MacBook Air display will appear brighter and contrast will increase, making the display look significantly improved. Display calibration only takes a minute or two with “Expert Mode”, just be sure to calibrate colors in a neutrally lit environment with the brightness temporarily turned up to get the best results. 2: Maximize Screen Usage with Full Screen Apps & Dock Hiding Taking apps full screen makes the best of the smaller screen sizes of the MacBook Air, which is particularly important on the 11″ model, but still has nice benefits on the 13″ Air. Just toggling the Full Screen button in the corner of most apps is all it takes, or set a keyboard shortcut for this purpose if that's your preference. When not working full screen, having the Dock automatically hide itself is another great way to save some screen real estate. All that's necessary to achieve that is to hit Command+Option+D, and the Dock will automatically disappear and reappear again when you hover the cursor near it. Or you can toggle it yourself in the Dock settings. These are the two simplest tricks to get the best use of a smaller display, but we've covered more tips for being productive with small screens before if you're interested in some more advanced solutions. 3: Learn the 2 Simplest Tricks to Maximize Battery Life The MacBook Air gets stellar battery life on it's own, but to get the absolute most battery life out of your Air you'll want to focus on two things: Manage screen brightness at a reasonable level, the best battery life comes under 65% brightness Keep actively running applications to a minimum when aiming for battery longevity For best results, go with 50% (or less) screen brightness, and quit out of every single app that isn't necessary for the task at hand. A simple trick for the latter is to use a DIY quit-all function and then selectively launch a single app or two that is needed to get the job done, keeping background activity to a minimum. Want even better battery life? follow some other tips to further boost that battery, relevant to all MacBook's be them an Air, Pro, Retina, or whatever else you're rocking. And don't forget to upgrade to OS X Mavericks when possible, because it has some serious battery enhancing features. 4: Rely on Cheap External Storage for Media & Backups Perhaps the only weakness of the MacBook Air is the size of onboard SSD storage, which can be inadequate when compared to laptops that use old fashioned hard drives. Fortunately, cheap external storage is now the norm, and it's very easy to augment the lightning fast built-in drive with affordable and portable external solutions. Owners of the 13″ model should spend a bit to grab a sizable SD card with decent storage capacity, which tucks nicely into the card reader on the side and adds a lot of storage capacity for a tiny price tag, making it a great place to store media files, movies, photos, downloads, and other stuff that doesn't necessarily need to be on the primary drive. Unfortunately, 11″ Air owners don't get the SD card option, but an external micro USB Flash drive can make a decent compromise and still remain small enough to not be a nuisance even if it does stick out of a USB slot. Speaking of external storage, grab a large external portable drive and partition it to serve as both a general use media drive and Time Machine destination. This allows you to share a single drive for backups and file storage and avoid a tangle of cables whether you're on the go or at a desk.
ioreg -lw0 | grep IODisplayEDID | sed "/[^<]* If you see something prefixed with “LP” reported back, you have a display panel that should be manually calibrated to look it's best. Open System Preferences, found in the Apple menu, and choose “Displays” Choose the “Colors” tab and click “Calibrate”, then check the box for “Expert Mode” to get the best results The effect is very hard to demonstrate in screen shots because images don't carry display profiles, you really need to check this yourself and run through calibration (or use a pre-made Air color profile for LG displays) to see the remarkable difference that is possible. The gist is that after a proper calibration, colors on the MacBook Air display will appear brighter and contrast will increase, making the display look significantly improved. Display calibration only takes a minute or two with “Expert Mode”, just be sure to calibrate colors in a neutrally lit environment with the brightness temporarily turned up to get the best results. 2: Maximize Screen Usage with Full Screen Apps & Dock Hiding Taking apps full screen makes the best of the smaller screen sizes of the MacBook Air, which is particularly important on the 11″ model, but still has nice benefits on the 13″ Air. Just toggling the Full Screen button in the corner of most apps is all it takes, or set a keyboard shortcut for this purpose if that's your preference. When not working full screen, having the Dock automatically hide itself is another great way to save some screen real estate. All that's necessary to achieve that is to hit Command+Option+D, and the Dock will automatically disappear and reappear again when you hover the cursor near it. Or you can toggle it yourself in the Dock settings. These are the two simplest tricks to get the best use of a smaller display, but we've covered more tips for being productive with small screens before if you're interested in some more advanced solutions. 3: Learn the 2 Simplest Tricks to Maximize Battery Life The MacBook Air gets stellar battery life on it's own, but to get the absolute most battery life out of your Air you'll want to focus on two things: Manage screen brightness at a reasonable level, the best battery life comes under 65% brightness Keep actively running applications to a minimum when aiming for battery longevity For best results, go with 50% (or less) screen brightness, and quit out of every single app that isn't necessary for the task at hand. A simple trick for the latter is to use a DIY quit-all function and then selectively launch a single app or two that is needed to get the job done, keeping background activity to a minimum. Want even better battery life? follow some other tips to further boost that battery, relevant to all MacBook's be them an Air, Pro, Retina, or whatever else you're rocking. And don't forget to upgrade to OS X Mavericks when possible, because it has some serious battery enhancing features. 4: Rely on Cheap External Storage for Media & Backups Perhaps the only weakness of the MacBook Air is the size of onboard SSD storage, which can be inadequate when compared to laptops that use old fashioned hard drives. Fortunately, cheap external storage is now the norm, and it's very easy to augment the lightning fast built-in drive with affordable and portable external solutions. Owners of the 13″ model should spend a bit to grab a sizable SD card with decent storage capacity, which tucks nicely into the card reader on the side and adds a lot of storage capacity for a tiny price tag, making it a great place to store media files, movies, photos, downloads, and other stuff that doesn't necessarily need to be on the primary drive. Unfortunately, 11″ Air owners don't get the SD card option, but an external micro USB Flash drive can make a decent compromise and still remain small enough to not be a nuisance even if it does stick out of a USB slot. Speaking of external storage, grab a large external portable drive and partition it to serve as both a general use media drive and Time Machine destination. This allows you to share a single drive for backups and file storage and avoid a tangle of cables whether you're on the go or at a desk.
ioreg -lw0 | grep IODisplayEDID | sed "/[^<]* If you see something prefixed with “LP” reported back, you have a display panel that should be manually calibrated to look it's best. Open System Preferences, found in the Apple menu, and choose “Displays” Choose the “Colors” tab and click “Calibrate”, then check the box for “Expert Mode” to get the best results The effect is very hard to demonstrate in screen shots because images don't carry display profiles, you really need to check this yourself and run through calibration (or use a pre-made Air color profile for LG displays) to see the remarkable difference that is possible. The gist is that after a proper calibration, colors on the MacBook Air display will appear brighter and contrast will increase, making the display look significantly improved. Display calibration only takes a minute or two with “Expert Mode”, just be sure to calibrate colors in a neutrally lit environment with the brightness temporarily turned up to get the best results. 2: Maximize Screen Usage with Full Screen Apps & Dock Hiding Taking apps full screen makes the best of the smaller screen sizes of the MacBook Air, which is particularly important on the 11″ model, but still has nice benefits on the 13″ Air. Just toggling the Full Screen button in the corner of most apps is all it takes, or set a keyboard shortcut for this purpose if that's your preference. When not working full screen, having the Dock automatically hide itself is another great way to save some screen real estate. All that's necessary to achieve that is to hit Command+Option+D, and the Dock will automatically disappear and reappear again when you hover the cursor near it. Or you can toggle it yourself in the Dock settings. These are the two simplest tricks to get the best use of a smaller display, but we've covered more tips for being productive with small screens before if you're interested in some more advanced solutions. 3: Learn the 2 Simplest Tricks to Maximize Battery Life The MacBook Air gets stellar battery life on it's own, but to get the absolute most battery life out of your Air you'll want to focus on two things: Manage screen brightness at a reasonable level, the best battery life comes under 65% brightness Keep actively running applications to a minimum when aiming for battery longevity For best results, go with 50% (or less) screen brightness, and quit out of every single app that isn't necessary for the task at hand. A simple trick for the latter is to use a DIY quit-all function and then selectively launch a single app or two that is needed to get the job done, keeping background activity to a minimum. Want even better battery life? follow some other tips to further boost that battery, relevant to all MacBook's be them an Air, Pro, Retina, or whatever else you're rocking. And don't forget to upgrade to OS X Mavericks when possible, because it has some serious battery enhancing features. 4: Rely on Cheap External Storage for Media & Backups Perhaps the only weakness of the MacBook Air is the size of onboard SSD storage, which can be inadequate when compared to laptops that use old fashioned hard drives. Fortunately, cheap external storage is now the norm, and it's very easy to augment the lightning fast built-in drive with affordable and portable external solutions. Owners of the 13″ model should spend a bit to grab a sizable SD card with decent storage capacity, which tucks nicely into the card reader on the side and adds a lot of storage capacity for a tiny price tag, making it a great place to store media files, movies, photos, downloads, and other stuff that doesn't necessarily need to be on the primary drive. Unfortunately, 11″ Air owners don't get the SD card option, but an external micro USB Flash drive can make a decent compromise and still remain small enough to not be a nuisance even if it does stick out of a USB slot. Speaking of external storage, grab a large external portable drive and partition it to serve as both a general use media drive and Time Machine destination. This allows you to share a single drive for backups and file storage and avoid a tangle of cables whether you're on the go or at a desk.
ioreg -lw0 | grep IODisplayEDID | sed "/[^<]* If you see something prefixed with “LP” reported back, you have a display panel that should be manually calibrated to look it's best. Open System Preferences, found in the Apple menu, and choose “Displays” Choose the “Colors” tab and click “Calibrate”, then check the box for “Expert Mode” to get the best results The effect is very hard to demonstrate in screen shots because images don't carry display profiles, you really need to check this yourself and run through calibration (or use a pre-made Air color profile for LG displays) to see the remarkable difference that is possible. The gist is that after a proper calibration, colors on the MacBook Air display will appear brighter and contrast will increase, making the display look significantly improved. Display calibration only takes a minute or two with “Expert Mode”, just be sure to calibrate colors in a neutrally lit environment with the brightness temporarily turned up to get the best results. 2: Maximize Screen Usage with Full Screen Apps & Dock Hiding Taking apps full screen makes the best of the smaller screen sizes of the MacBook Air, which is particularly important on the 11″ model, but still has nice benefits on the 13″ Air. Just toggling the Full Screen button in the corner of most apps is all it takes, or set a keyboard shortcut for this purpose if that's your preference. When not working full screen, having the Dock automatically hide itself is another great way to save some screen real estate. All that's necessary to achieve that is to hit Command+Option+D, and the Dock will automatically disappear and reappear again when you hover the cursor near it. Or you can toggle it yourself in the Dock settings. These are the two simplest tricks to get the best use of a smaller display, but we've covered more tips for being productive with small screens before if you're interested in some more advanced solutions. 3: Learn the 2 Simplest Tricks to Maximize Battery Life The MacBook Air gets stellar battery life on it's own, but to get the absolute most battery life out of your Air you'll want to focus on two things: Manage screen brightness at a reasonable level, the best battery life comes under 65% brightness Keep actively running applications to a minimum when aiming for battery longevity For best results, go with 50% (or less) screen brightness, and quit out of every single app that isn't necessary for the task at hand. A simple trick for the latter is to use a DIY quit-all function and then selectively launch a single app or two that is needed to get the job done, keeping background activity to a minimum. Want even better battery life? follow some other tips to further boost that battery, relevant to all MacBook's be them an Air, Pro, Retina, or whatever else you're rocking. And don't forget to upgrade to OS X Mavericks when possible, because it has some serious battery enhancing features. 4: Rely on Cheap External Storage for Media & Backups Perhaps the only weakness of the MacBook Air is the size of onboard SSD storage, which can be inadequate when compared to laptops that use old fashioned hard drives. Fortunately, cheap external storage is now the norm, and it's very easy to augment the lightning fast built-in drive with affordable and portable external solutions. Owners of the 13″ model should spend a bit to grab a sizable SD card with decent storage capacity, which tucks nicely into the card reader on the side and adds a lot of storage capacity for a tiny price tag, making it a great place to store media files, movies, photos, downloads, and other stuff that doesn't necessarily need to be on the primary drive. Unfortunately, 11″ Air owners don't get the SD card option, but an external micro USB Flash drive can make a decent compromise and still remain small enough to not be a nuisance even if it does stick out of a USB slot. Speaking of external storage, grab a large external portable drive and partition it to serve as both a general use media drive and Time Machine destination. This allows you to share a single drive for backups and file storage and avoid a tangle of cables whether you're on the go or at a desk.
ioreg -lw0 | grep IODisplayEDID | sed "/[^<]* If you see something prefixed with “LP” reported back, you have a display panel that should be manually calibrated to look it's best. Open System Preferences, found in the Apple menu, and choose “Displays” Choose the “Colors” tab and click “Calibrate”, then check the box for “Expert Mode” to get the best results The effect is very hard to demonstrate in screen shots because images don't carry display profiles, you really need to check this yourself and run through calibration (or use a pre-made Air color profile for LG displays) to see the remarkable difference that is possible. The gist is that after a proper calibration, colors on the MacBook Air display will appear brighter and contrast will increase, making the display look significantly improved. Display calibration only takes a minute or two with “Expert Mode”, just be sure to calibrate colors in a neutrally lit environment with the brightness temporarily turned up to get the best results. 2: Maximize Screen Usage with Full Screen Apps & Dock Hiding Taking apps full screen makes the best of the smaller screen sizes of the MacBook Air, which is particularly important on the 11″ model, but still has nice benefits on the 13″ Air. Just toggling the Full Screen button in the corner of most apps is all it takes, or set a keyboard shortcut for this purpose if that's your preference. When not working full screen, having the Dock automatically hide itself is another great way to save some screen real estate. All that's necessary to achieve that is to hit Command+Option+D, and the Dock will automatically disappear and reappear again when you hover the cursor near it. Or you can toggle it yourself in the Dock settings. These are the two simplest tricks to get the best use of a smaller display, but we've covered more tips for being productive with small screens before if you're interested in some more advanced solutions. 3: Learn the 2 Simplest Tricks to Maximize Battery Life The MacBook Air gets stellar battery life on it's own, but to get the absolute most battery life out of your Air you'll want to focus on two things: Manage screen brightness at a reasonable level, the best battery life comes under 65% brightness Keep actively running applications to a minimum when aiming for battery longevity For best results, go with 50% (or less) screen brightness, and quit out of every single app that isn't necessary for the task at hand. A simple trick for the latter is to use a DIY quit-all function and then selectively launch a single app or two that is needed to get the job done, keeping background activity to a minimum. Want even better battery life? follow some other tips to further boost that battery, relevant to all MacBook's be them an Air, Pro, Retina, or whatever else you're rocking. And don't forget to upgrade to OS X Mavericks when possible, because it has some serious battery enhancing features. 4: Rely on Cheap External Storage for Media & Backups Perhaps the only weakness of the MacBook Air is the size of onboard SSD storage, which can be inadequate when compared to laptops that use old fashioned hard drives. Fortunately, cheap external storage is now the norm, and it's very easy to augment the lightning fast built-in drive with affordable and portable external solutions. Owners of the 13″ model should spend a bit to grab a sizable SD card with decent storage capacity, which tucks nicely into the card reader on the side and adds a lot of storage capacity for a tiny price tag, making it a great place to store media files, movies, photos, downloads, and other stuff that doesn't necessarily need to be on the primary drive. Unfortunately, 11″ Air owners don't get the SD card option, but an external micro USB Flash drive can make a decent compromise and still remain small enough to not be a nuisance even if it does stick out of a USB slot. Speaking of external storage, grab a large external portable drive and partition it to serve as both a general use media drive and Time Machine destination. This allows you to share a single drive for backups and file storage and avoid a tangle of cables whether you're on the go or at a desk.
ioreg -lw0 | grep IODisplayEDID | sed "/[^<]* If you see something prefixed with “LP” reported back, you have a display panel that should be manually calibrated to look it's best. Open System Preferences, found in the Apple menu, and choose “Displays” Choose the “Colors” tab and click “Calibrate”, then check the box for “Expert Mode” to get the best results The effect is very hard to demonstrate in screen shots because images don't carry display profiles, you really need to check this yourself and run through calibration (or use a pre-made Air color profile for LG displays) to see the remarkable difference that is possible. The gist is that after a proper calibration, colors on the MacBook Air display will appear brighter and contrast will increase, making the display look significantly improved. Display calibration only takes a minute or two with “Expert Mode”, just be sure to calibrate colors in a neutrally lit environment with the brightness temporarily turned up to get the best results. 2: Maximize Screen Usage with Full Screen Apps & Dock Hiding Taking apps full screen makes the best of the smaller screen sizes of the MacBook Air, which is particularly important on the 11″ model, but still has nice benefits on the 13″ Air. Just toggling the Full Screen button in the corner of most apps is all it takes, or set a keyboard shortcut for this purpose if that's your preference. When not working full screen, having the Dock automatically hide itself is another great way to save some screen real estate. All that's necessary to achieve that is to hit Command+Option+D, and the Dock will automatically disappear and reappear again when you hover the cursor near it. Or you can toggle it yourself in the Dock settings. These are the two simplest tricks to get the best use of a smaller display, but we've covered more tips for being productive with small screens before if you're interested in some more advanced solutions. 3: Learn the 2 Simplest Tricks to Maximize Battery Life The MacBook Air gets stellar battery life on it's own, but to get the absolute most battery life out of your Air you'll want to focus on two things: Manage screen brightness at a reasonable level, the best battery life comes under 65% brightness Keep actively running applications to a minimum when aiming for battery longevity For best results, go with 50% (or less) screen brightness, and quit out of every single app that isn't necessary for the task at hand. A simple trick for the latter is to use a DIY quit-all function and then selectively launch a single app or two that is needed to get the job done, keeping background activity to a minimum. Want even better battery life? follow some other tips to further boost that battery, relevant to all MacBook's be them an Air, Pro, Retina, or whatever else you're rocking. And don't forget to upgrade to OS X Mavericks when possible, because it has some serious battery enhancing features. 4: Rely on Cheap External Storage for Media & Backups Perhaps the only weakness of the MacBook Air is the size of onboard SSD storage, which can be inadequate when compared to laptops that use old fashioned hard drives. Fortunately, cheap external storage is now the norm, and it's very easy to augment the lightning fast built-in drive with affordable and portable external solutions. Owners of the 13″ model should spend a bit to grab a sizable SD card with decent storage capacity, which tucks nicely into the card reader on the side and adds a lot of storage capacity for a tiny price tag, making it a great place to store media files, movies, photos, downloads, and other stuff that doesn't necessarily need to be on the primary drive. Unfortunately, 11″ Air owners don't get the SD card option, but an external micro USB Flash drive can make a decent compromise and still remain small enough to not be a nuisance even if it does stick out of a USB slot. Speaking of external storage, grab a large external portable drive and partition it to serve as both a general use media drive and Time Machine destination. This allows you to share a single drive for backups and file storage and avoid a tangle of cables whether you're on the go or at a desk.
Display calibration only takes a minute or two with “Expert Mode”, just be sure to calibrate colors in a neutrally lit environment with the brightness temporarily turned up to get the best results. 2: Maximize Screen Usage with Full Screen Apps & Dock Hiding Taking apps full screen makes the best of the smaller screen sizes of the MacBook Air, which is particularly important on the 11″ model, but still has nice benefits on the 13″ Air. Just toggling the Full Screen button in the corner of most apps is all it takes, or set a keyboard shortcut for this purpose if that's your preference. When not working full screen, having the Dock automatically hide itself is another great way to save some screen real estate. All that's necessary to achieve that is to hit Command+Option+D, and the Dock will automatically disappear and reappear again when you hover the cursor near it. Or you can toggle it yourself in the Dock settings. These are the two simplest tricks to get the best use of a smaller display, but we've covered more tips for being productive with small screens before if you're interested in some more advanced solutions. 3: Learn the 2 Simplest Tricks to Maximize Battery Life The MacBook Air gets stellar battery life on it's own, but to get the absolute most battery life out of your Air you'll want to focus on two things: Manage screen brightness at a reasonable level, the best battery life comes under 65% brightness Keep actively running applications to a minimum when aiming for battery longevity For best results, go with 50% (or less) screen brightness, and quit out of every single app that isn't necessary for the task at hand. A simple trick for the latter is to use a DIY quit-all function and then selectively launch a single app or two that is needed to get the job done, keeping background activity to a minimum. Want even better battery life? follow some other tips to further boost that battery, relevant to all MacBook's be them an Air, Pro, Retina, or whatever else you're rocking. And don't forget to upgrade to OS X Mavericks when possible, because it has some serious battery enhancing features. 4: Rely on Cheap External Storage for Media & Backups Perhaps the only weakness of the MacBook Air is the size of onboard SSD storage, which can be inadequate when compared to laptops that use old fashioned hard drives. Fortunately, cheap external storage is now the norm, and it's very easy to augment the lightning fast built-in drive with affordable and portable external solutions. Owners of the 13″ model should spend a bit to grab a sizable SD card with decent storage capacity, which tucks nicely into the card reader on the side and adds a lot of storage capacity for a tiny price tag, making it a great place to store media files, movies, photos, downloads, and other stuff that doesn't necessarily need to be on the primary drive. Unfortunately, 11″ Air owners don't get the SD card option, but an external micro USB Flash drive can make a decent compromise and still remain small enough to not be a nuisance even if it does stick out of a USB slot. Speaking of external storage, grab a large external portable drive and partition it to serve as both a general use media drive and Time Machine destination. This allows you to share a single drive for backups and file storage and avoid a tangle of cables whether you're on the go or at a desk.ioreg -lw0 | grep IODisplayEDID | sed "/[^<]* If you see something prefixed with “LP” reported back, you have a display panel that should be manually calibrated to look it's best. Open System Preferences, found in the Apple menu, and choose “Displays” Choose the “Colors” tab and click “Calibrate”, then check the box for “Expert Mode” to get the best results The effect is very hard to demonstrate in screen shots because images don't carry display profiles, you really need to check this yourself and run through calibration (or use a pre-made Air color profile for LG displays) to see the remarkable difference that is possible. The gist is that after a proper calibration, colors on the MacBook Air display will appear brighter and contrast will increase, making the display look significantly improved. Display calibration only takes a minute or two with “Expert Mode”, just be sure to calibrate colors in a neutrally lit environment with the brightness temporarily turned up to get the best results. 2: Maximize Screen Usage with Full Screen Apps & Dock Hiding Taking apps full screen makes the best of the smaller screen sizes of the MacBook Air, which is particularly important on the 11″ model, but still has nice benefits on the 13″ Air. Just toggling the Full Screen button in the corner of most apps is all it takes, or set a keyboard shortcut for this purpose if that's your preference. When not working full screen, having the Dock automatically hide itself is another great way to save some screen real estate. All that's necessary to achieve that is to hit Command+Option+D, and the Dock will automatically disappear and reappear again when you hover the cursor near it. Or you can toggle it yourself in the Dock settings. These are the two simplest tricks to get the best use of a smaller display, but we've covered more tips for being productive with small screens before if you're interested in some more advanced solutions. 3: Learn the 2 Simplest Tricks to Maximize Battery Life The MacBook Air gets stellar battery life on it's own, but to get the absolute most battery life out of your Air you'll want to focus on two things: Manage screen brightness at a reasonable level, the best battery life comes under 65% brightness Keep actively running applications to a minimum when aiming for battery longevity For best results, go with 50% (or less) screen brightness, and quit out of every single app that isn't necessary for the task at hand. A simple trick for the latter is to use a DIY quit-all function and then selectively launch a single app or two that is needed to get the job done, keeping background activity to a minimum. Want even better battery life? follow some other tips to further boost that battery, relevant to all MacBook's be them an Air, Pro, Retina, or whatever else you're rocking. And don't forget to upgrade to OS X Mavericks when possible, because it has some serious battery enhancing features. 4: Rely on Cheap External Storage for Media & Backups Perhaps the only weakness of the MacBook Air is the size of onboard SSD storage, which can be inadequate when compared to laptops that use old fashioned hard drives. Fortunately, cheap external storage is now the norm, and it's very easy to augment the lightning fast built-in drive with affordable and portable external solutions. Owners of the 13″ model should spend a bit to grab a sizable SD card with decent storage capacity, which tucks nicely into the card reader on the side and adds a lot of storage capacity for a tiny price tag, making it a great place to store media files, movies, photos, downloads, and other stuff that doesn't necessarily need to be on the primary drive. Unfortunately, 11″ Air owners don't get the SD card option, but an external micro USB Flash drive can make a decent compromise and still remain small enough to not be a nuisance even if it does stick out of a USB slot. Speaking of external storage, grab a large external portable drive and partition it to serve as both a general use media drive and Time Machine destination. This allows you to share a single drive for backups and file storage and avoid a tangle of cables whether you're on the go or at a desk.
ioreg -lw0 | grep IODisplayEDID | sed "/[^<]* If you see something prefixed with “LP” reported back, you have a display panel that should be manually calibrated to look it's best. Open System Preferences, found in the Apple menu, and choose “Displays” Choose the “Colors” tab and click “Calibrate”, then check the box for “Expert Mode” to get the best results The effect is very hard to demonstrate in screen shots because images don't carry display profiles, you really need to check this yourself and run through calibration (or use a pre-made Air color profile for LG displays) to see the remarkable difference that is possible. The gist is that after a proper calibration, colors on the MacBook Air display will appear brighter and contrast will increase, making the display look significantly improved. Display calibration only takes a minute or two with “Expert Mode”, just be sure to calibrate colors in a neutrally lit environment with the brightness temporarily turned up to get the best results. 2: Maximize Screen Usage with Full Screen Apps & Dock Hiding Taking apps full screen makes the best of the smaller screen sizes of the MacBook Air, which is particularly important on the 11″ model, but still has nice benefits on the 13″ Air. Just toggling the Full Screen button in the corner of most apps is all it takes, or set a keyboard shortcut for this purpose if that's your preference. When not working full screen, having the Dock automatically hide itself is another great way to save some screen real estate. All that's necessary to achieve that is to hit Command+Option+D, and the Dock will automatically disappear and reappear again when you hover the cursor near it. Or you can toggle it yourself in the Dock settings. These are the two simplest tricks to get the best use of a smaller display, but we've covered more tips for being productive with small screens before if you're interested in some more advanced solutions. 3: Learn the 2 Simplest Tricks to Maximize Battery Life The MacBook Air gets stellar battery life on it's own, but to get the absolute most battery life out of your Air you'll want to focus on two things: Manage screen brightness at a reasonable level, the best battery life comes under 65% brightness Keep actively running applications to a minimum when aiming for battery longevity For best results, go with 50% (or less) screen brightness, and quit out of every single app that isn't necessary for the task at hand. A simple trick for the latter is to use a DIY quit-all function and then selectively launch a single app or two that is needed to get the job done, keeping background activity to a minimum. Want even better battery life? follow some other tips to further boost that battery, relevant to all MacBook's be them an Air, Pro, Retina, or whatever else you're rocking. And don't forget to upgrade to OS X Mavericks when possible, because it has some serious battery enhancing features. 4: Rely on Cheap External Storage for Media & Backups Perhaps the only weakness of the MacBook Air is the size of onboard SSD storage, which can be inadequate when compared to laptops that use old fashioned hard drives. Fortunately, cheap external storage is now the norm, and it's very easy to augment the lightning fast built-in drive with affordable and portable external solutions. Owners of the 13″ model should spend a bit to grab a sizable SD card with decent storage capacity, which tucks nicely into the card reader on the side and adds a lot of storage capacity for a tiny price tag, making it a great place to store media files, movies, photos, downloads, and other stuff that doesn't necessarily need to be on the primary drive. Unfortunately, 11″ Air owners don't get the SD card option, but an external micro USB Flash drive can make a decent compromise and still remain small enough to not be a nuisance even if it does stick out of a USB slot. Speaking of external storage, grab a large external portable drive and partition it to serve as both a general use media drive and Time Machine destination. This allows you to share a single drive for backups and file storage and avoid a tangle of cables whether you're on the go or at a desk.ioreg -lw0 | grep IODisplayEDID | sed "/[^<]* If you see something prefixed with “LP” reported back, you have a display panel that should be manually calibrated to look it's best. Open System Preferences, found in the Apple menu, and choose “Displays” Choose the “Colors” tab and click “Calibrate”, then check the box for “Expert Mode” to get the best results The effect is very hard to demonstrate in screen shots because images don't carry display profiles, you really need to check this yourself and run through calibration (or use a pre-made Air color profile for LG displays) to see the remarkable difference that is possible. The gist is that after a proper calibration, colors on the MacBook Air display will appear brighter and contrast will increase, making the display look significantly improved. Display calibration only takes a minute or two with “Expert Mode”, just be sure to calibrate colors in a neutrally lit environment with the brightness temporarily turned up to get the best results. 2: Maximize Screen Usage with Full Screen Apps & Dock Hiding Taking apps full screen makes the best of the smaller screen sizes of the MacBook Air, which is particularly important on the 11″ model, but still has nice benefits on the 13″ Air. Just toggling the Full Screen button in the corner of most apps is all it takes, or set a keyboard shortcut for this purpose if that's your preference. When not working full screen, having the Dock automatically hide itself is another great way to save some screen real estate. All that's necessary to achieve that is to hit Command+Option+D, and the Dock will automatically disappear and reappear again when you hover the cursor near it. Or you can toggle it yourself in the Dock settings. These are the two simplest tricks to get the best use of a smaller display, but we've covered more tips for being productive with small screens before if you're interested in some more advanced solutions. 3: Learn the 2 Simplest Tricks to Maximize Battery Life The MacBook Air gets stellar battery life on it's own, but to get the absolute most battery life out of your Air you'll want to focus on two things: Manage screen brightness at a reasonable level, the best battery life comes under 65% brightness Keep actively running applications to a minimum when aiming for battery longevity For best results, go with 50% (or less) screen brightness, and quit out of every single app that isn't necessary for the task at hand. A simple trick for the latter is to use a DIY quit-all function and then selectively launch a single app or two that is needed to get the job done, keeping background activity to a minimum. Want even better battery life? follow some other tips to further boost that battery, relevant to all MacBook's be them an Air, Pro, Retina, or whatever else you're rocking. And don't forget to upgrade to OS X Mavericks when possible, because it has some serious battery enhancing features. 4: Rely on Cheap External Storage for Media & Backups Perhaps the only weakness of the MacBook Air is the size of onboard SSD storage, which can be inadequate when compared to laptops that use old fashioned hard drives. Fortunately, cheap external storage is now the norm, and it's very easy to augment the lightning fast built-in drive with affordable and portable external solutions. Owners of the 13″ model should spend a bit to grab a sizable SD card with decent storage capacity, which tucks nicely into the card reader on the side and adds a lot of storage capacity for a tiny price tag, making it a great place to store media files, movies, photos, downloads, and other stuff that doesn't necessarily need to be on the primary drive. Unfortunately, 11″ Air owners don't get the SD card option, but an external micro USB Flash drive can make a decent compromise and still remain small enough to not be a nuisance even if it does stick out of a USB slot. Speaking of external storage, grab a large external portable drive and partition it to serve as both a general use media drive and Time Machine destination. This allows you to share a single drive for backups and file storage and avoid a tangle of cables whether you're on the go or at a desk.
ioreg -lw0 | grep IODisplayEDID | sed "/[^<]* If you see something prefixed with “LP” reported back, you have a display panel that should be manually calibrated to look it's best. Open System Preferences, found in the Apple menu, and choose “Displays” Choose the “Colors” tab and click “Calibrate”, then check the box for “Expert Mode” to get the best results The effect is very hard to demonstrate in screen shots because images don't carry display profiles, you really need to check this yourself and run through calibration (or use a pre-made Air color profile for LG displays) to see the remarkable difference that is possible. The gist is that after a proper calibration, colors on the MacBook Air display will appear brighter and contrast will increase, making the display look significantly improved. Display calibration only takes a minute or two with “Expert Mode”, just be sure to calibrate colors in a neutrally lit environment with the brightness temporarily turned up to get the best results. 2: Maximize Screen Usage with Full Screen Apps & Dock Hiding Taking apps full screen makes the best of the smaller screen sizes of the MacBook Air, which is particularly important on the 11″ model, but still has nice benefits on the 13″ Air. Just toggling the Full Screen button in the corner of most apps is all it takes, or set a keyboard shortcut for this purpose if that's your preference. When not working full screen, having the Dock automatically hide itself is another great way to save some screen real estate. All that's necessary to achieve that is to hit Command+Option+D, and the Dock will automatically disappear and reappear again when you hover the cursor near it. Or you can toggle it yourself in the Dock settings. These are the two simplest tricks to get the best use of a smaller display, but we've covered more tips for being productive with small screens before if you're interested in some more advanced solutions. 3: Learn the 2 Simplest Tricks to Maximize Battery Life The MacBook Air gets stellar battery life on it's own, but to get the absolute most battery life out of your Air you'll want to focus on two things: Manage screen brightness at a reasonable level, the best battery life comes under 65% brightness Keep actively running applications to a minimum when aiming for battery longevity For best results, go with 50% (or less) screen brightness, and quit out of every single app that isn't necessary for the task at hand. A simple trick for the latter is to use a DIY quit-all function and then selectively launch a single app or two that is needed to get the job done, keeping background activity to a minimum. Want even better battery life? follow some other tips to further boost that battery, relevant to all MacBook's be them an Air, Pro, Retina, or whatever else you're rocking. And don't forget to upgrade to OS X Mavericks when possible, because it has some serious battery enhancing features. 4: Rely on Cheap External Storage for Media & Backups Perhaps the only weakness of the MacBook Air is the size of onboard SSD storage, which can be inadequate when compared to laptops that use old fashioned hard drives. Fortunately, cheap external storage is now the norm, and it's very easy to augment the lightning fast built-in drive with affordable and portable external solutions. Owners of the 13″ model should spend a bit to grab a sizable SD card with decent storage capacity, which tucks nicely into the card reader on the side and adds a lot of storage capacity for a tiny price tag, making it a great place to store media files, movies, photos, downloads, and other stuff that doesn't necessarily need to be on the primary drive. Unfortunately, 11″ Air owners don't get the SD card option, but an external micro USB Flash drive can make a decent compromise and still remain small enough to not be a nuisance even if it does stick out of a USB slot. Speaking of external storage, grab a large external portable drive and partition it to serve as both a general use media drive and Time Machine destination. This allows you to share a single drive for backups and file storage and avoid a tangle of cables whether you're on the go or at a desk.
ioreg -lw0 | grep IODisplayEDID | sed "/[^<]* If you see something prefixed with “LP” reported back, you have a display panel that should be manually calibrated to look it's best. Open System Preferences, found in the Apple menu, and choose “Displays” Choose the “Colors” tab and click “Calibrate”, then check the box for “Expert Mode” to get the best results The effect is very hard to demonstrate in screen shots because images don't carry display profiles, you really need to check this yourself and run through calibration (or use a pre-made Air color profile for LG displays) to see the remarkable difference that is possible. The gist is that after a proper calibration, colors on the MacBook Air display will appear brighter and contrast will increase, making the display look significantly improved. Display calibration only takes a minute or two with “Expert Mode”, just be sure to calibrate colors in a neutrally lit environment with the brightness temporarily turned up to get the best results. 2: Maximize Screen Usage with Full Screen Apps & Dock Hiding Taking apps full screen makes the best of the smaller screen sizes of the MacBook Air, which is particularly important on the 11″ model, but still has nice benefits on the 13″ Air. Just toggling the Full Screen button in the corner of most apps is all it takes, or set a keyboard shortcut for this purpose if that's your preference. When not working full screen, having the Dock automatically hide itself is another great way to save some screen real estate. All that's necessary to achieve that is to hit Command+Option+D, and the Dock will automatically disappear and reappear again when you hover the cursor near it. Or you can toggle it yourself in the Dock settings. These are the two simplest tricks to get the best use of a smaller display, but we've covered more tips for being productive with small screens before if you're interested in some more advanced solutions. 3: Learn the 2 Simplest Tricks to Maximize Battery Life The MacBook Air gets stellar battery life on it's own, but to get the absolute most battery life out of your Air you'll want to focus on two things: Manage screen brightness at a reasonable level, the best battery life comes under 65% brightness Keep actively running applications to a minimum when aiming for battery longevity For best results, go with 50% (or less) screen brightness, and quit out of every single app that isn't necessary for the task at hand. A simple trick for the latter is to use a DIY quit-all function and then selectively launch a single app or two that is needed to get the job done, keeping background activity to a minimum. Want even better battery life? follow some other tips to further boost that battery, relevant to all MacBook's be them an Air, Pro, Retina, or whatever else you're rocking. And don't forget to upgrade to OS X Mavericks when possible, because it has some serious battery enhancing features. 4: Rely on Cheap External Storage for Media & Backups Perhaps the only weakness of the MacBook Air is the size of onboard SSD storage, which can be inadequate when compared to laptops that use old fashioned hard drives. Fortunately, cheap external storage is now the norm, and it's very easy to augment the lightning fast built-in drive with affordable and portable external solutions. Owners of the 13″ model should spend a bit to grab a sizable SD card with decent storage capacity, which tucks nicely into the card reader on the side and adds a lot of storage capacity for a tiny price tag, making it a great place to store media files, movies, photos, downloads, and other stuff that doesn't necessarily need to be on the primary drive. Unfortunately, 11″ Air owners don't get the SD card option, but an external micro USB Flash drive can make a decent compromise and still remain small enough to not be a nuisance even if it does stick out of a USB slot. Speaking of external storage, grab a large external portable drive and partition it to serve as both a general use media drive and Time Machine destination. This allows you to share a single drive for backups and file storage and avoid a tangle of cables whether you're on the go or at a desk.
ioreg -lw0 | grep IODisplayEDID | sed "/[^<]* If you see something prefixed with “LP” reported back, you have a display panel that should be manually calibrated to look it's best. Open System Preferences, found in the Apple menu, and choose “Displays” Choose the “Colors” tab and click “Calibrate”, then check the box for “Expert Mode” to get the best results The effect is very hard to demonstrate in screen shots because images don't carry display profiles, you really need to check this yourself and run through calibration (or use a pre-made Air color profile for LG displays) to see the remarkable difference that is possible. The gist is that after a proper calibration, colors on the MacBook Air display will appear brighter and contrast will increase, making the display look significantly improved. Display calibration only takes a minute or two with “Expert Mode”, just be sure to calibrate colors in a neutrally lit environment with the brightness temporarily turned up to get the best results. 2: Maximize Screen Usage with Full Screen Apps & Dock Hiding Taking apps full screen makes the best of the smaller screen sizes of the MacBook Air, which is particularly important on the 11″ model, but still has nice benefits on the 13″ Air. Just toggling the Full Screen button in the corner of most apps is all it takes, or set a keyboard shortcut for this purpose if that's your preference. When not working full screen, having the Dock automatically hide itself is another great way to save some screen real estate. All that's necessary to achieve that is to hit Command+Option+D, and the Dock will automatically disappear and reappear again when you hover the cursor near it. Or you can toggle it yourself in the Dock settings. These are the two simplest tricks to get the best use of a smaller display, but we've covered more tips for being productive with small screens before if you're interested in some more advanced solutions. 3: Learn the 2 Simplest Tricks to Maximize Battery Life The MacBook Air gets stellar battery life on it's own, but to get the absolute most battery life out of your Air you'll want to focus on two things: Manage screen brightness at a reasonable level, the best battery life comes under 65% brightness Keep actively running applications to a minimum when aiming for battery longevity For best results, go with 50% (or less) screen brightness, and quit out of every single app that isn't necessary for the task at hand. A simple trick for the latter is to use a DIY quit-all function and then selectively launch a single app or two that is needed to get the job done, keeping background activity to a minimum. Want even better battery life? follow some other tips to further boost that battery, relevant to all MacBook's be them an Air, Pro, Retina, or whatever else you're rocking. And don't forget to upgrade to OS X Mavericks when possible, because it has some serious battery enhancing features. 4: Rely on Cheap External Storage for Media & Backups Perhaps the only weakness of the MacBook Air is the size of onboard SSD storage, which can be inadequate when compared to laptops that use old fashioned hard drives. Fortunately, cheap external storage is now the norm, and it's very easy to augment the lightning fast built-in drive with affordable and portable external solutions. Owners of the 13″ model should spend a bit to grab a sizable SD card with decent storage capacity, which tucks nicely into the card reader on the side and adds a lot of storage capacity for a tiny price tag, making it a great place to store media files, movies, photos, downloads, and other stuff that doesn't necessarily need to be on the primary drive. Unfortunately, 11″ Air owners don't get the SD card option, but an external micro USB Flash drive can make a decent compromise and still remain small enough to not be a nuisance even if it does stick out of a USB slot. Speaking of external storage, grab a large external portable drive and partition it to serve as both a general use media drive and Time Machine destination. This allows you to share a single drive for backups and file storage and avoid a tangle of cables whether you're on the go or at a desk.
Display calibration only takes a minute or two with “Expert Mode”, just be sure to calibrate colors in a neutrally lit environment with the brightness temporarily turned up to get the best results. 2: Maximize Screen Usage with Full Screen Apps & Dock Hiding Taking apps full screen makes the best of the smaller screen sizes of the MacBook Air, which is particularly important on the 11″ model, but still has nice benefits on the 13″ Air. Just toggling the Full Screen button in the corner of most apps is all it takes, or set a keyboard shortcut for this purpose if that's your preference. When not working full screen, having the Dock automatically hide itself is another great way to save some screen real estate. All that's necessary to achieve that is to hit Command+Option+D, and the Dock will automatically disappear and reappear again when you hover the cursor near it. Or you can toggle it yourself in the Dock settings. These are the two simplest tricks to get the best use of a smaller display, but we've covered more tips for being productive with small screens before if you're interested in some more advanced solutions. 3: Learn the 2 Simplest Tricks to Maximize Battery Life The MacBook Air gets stellar battery life on it's own, but to get the absolute most battery life out of your Air you'll want to focus on two things: Manage screen brightness at a reasonable level, the best battery life comes under 65% brightness Keep actively running applications to a minimum when aiming for battery longevity For best results, go with 50% (or less) screen brightness, and quit out of every single app that isn't necessary for the task at hand. A simple trick for the latter is to use a DIY quit-all function and then selectively launch a single app or two that is needed to get the job done, keeping background activity to a minimum. Want even better battery life? follow some other tips to further boost that battery, relevant to all MacBook's be them an Air, Pro, Retina, or whatever else you're rocking. And don't forget to upgrade to OS X Mavericks when possible, because it has some serious battery enhancing features. 4: Rely on Cheap External Storage for Media & Backups Perhaps the only weakness of the MacBook Air is the size of onboard SSD storage, which can be inadequate when compared to laptops that use old fashioned hard drives. Fortunately, cheap external storage is now the norm, and it's very easy to augment the lightning fast built-in drive with affordable and portable external solutions. Owners of the 13″ model should spend a bit to grab a sizable SD card with decent storage capacity, which tucks nicely into the card reader on the side and adds a lot of storage capacity for a tiny price tag, making it a great place to store media files, movies, photos, downloads, and other stuff that doesn't necessarily need to be on the primary drive. Unfortunately, 11″ Air owners don't get the SD card option, but an external micro USB Flash drive can make a decent compromise and still remain small enough to not be a nuisance even if it does stick out of a USB slot. Speaking of external storage, grab a large external portable drive and partition it to serve as both a general use media drive and Time Machine destination. This allows you to share a single drive for backups and file storage and avoid a tangle of cables whether you're on the go or at a desk.ioreg -lw0 | grep IODisplayEDID | sed "/[^<]* If you see something prefixed with “LP” reported back, you have a display panel that should be manually calibrated to look it's best. Open System Preferences, found in the Apple menu, and choose “Displays” Choose the “Colors” tab and click “Calibrate”, then check the box for “Expert Mode” to get the best results The effect is very hard to demonstrate in screen shots because images don't carry display profiles, you really need to check this yourself and run through calibration (or use a pre-made Air color profile for LG displays) to see the remarkable difference that is possible. The gist is that after a proper calibration, colors on the MacBook Air display will appear brighter and contrast will increase, making the display look significantly improved. Display calibration only takes a minute or two with “Expert Mode”, just be sure to calibrate colors in a neutrally lit environment with the brightness temporarily turned up to get the best results. 2: Maximize Screen Usage with Full Screen Apps & Dock Hiding Taking apps full screen makes the best of the smaller screen sizes of the MacBook Air, which is particularly important on the 11″ model, but still has nice benefits on the 13″ Air. Just toggling the Full Screen button in the corner of most apps is all it takes, or set a keyboard shortcut for this purpose if that's your preference. When not working full screen, having the Dock automatically hide itself is another great way to save some screen real estate. All that's necessary to achieve that is to hit Command+Option+D, and the Dock will automatically disappear and reappear again when you hover the cursor near it. Or you can toggle it yourself in the Dock settings. These are the two simplest tricks to get the best use of a smaller display, but we've covered more tips for being productive with small screens before if you're interested in some more advanced solutions. 3: Learn the 2 Simplest Tricks to Maximize Battery Life The MacBook Air gets stellar battery life on it's own, but to get the absolute most battery life out of your Air you'll want to focus on two things: Manage screen brightness at a reasonable level, the best battery life comes under 65% brightness Keep actively running applications to a minimum when aiming for battery longevity For best results, go with 50% (or less) screen brightness, and quit out of every single app that isn't necessary for the task at hand. A simple trick for the latter is to use a DIY quit-all function and then selectively launch a single app or two that is needed to get the job done, keeping background activity to a minimum. Want even better battery life? follow some other tips to further boost that battery, relevant to all MacBook's be them an Air, Pro, Retina, or whatever else you're rocking. And don't forget to upgrade to OS X Mavericks when possible, because it has some serious battery enhancing features. 4: Rely on Cheap External Storage for Media & Backups Perhaps the only weakness of the MacBook Air is the size of onboard SSD storage, which can be inadequate when compared to laptops that use old fashioned hard drives. Fortunately, cheap external storage is now the norm, and it's very easy to augment the lightning fast built-in drive with affordable and portable external solutions. Owners of the 13″ model should spend a bit to grab a sizable SD card with decent storage capacity, which tucks nicely into the card reader on the side and adds a lot of storage capacity for a tiny price tag, making it a great place to store media files, movies, photos, downloads, and other stuff that doesn't necessarily need to be on the primary drive. Unfortunately, 11″ Air owners don't get the SD card option, but an external micro USB Flash drive can make a decent compromise and still remain small enough to not be a nuisance even if it does stick out of a USB slot. Speaking of external storage, grab a large external portable drive and partition it to serve as both a general use media drive and Time Machine destination. This allows you to share a single drive for backups and file storage and avoid a tangle of cables whether you're on the go or at a desk.
ioreg -lw0 | grep IODisplayEDID | sed "/[^<]* If you see something prefixed with “LP” reported back, you have a display panel that should be manually calibrated to look it's best. Open System Preferences, found in the Apple menu, and choose “Displays” Choose the “Colors” tab and click “Calibrate”, then check the box for “Expert Mode” to get the best results The effect is very hard to demonstrate in screen shots because images don't carry display profiles, you really need to check this yourself and run through calibration (or use a pre-made Air color profile for LG displays) to see the remarkable difference that is possible. The gist is that after a proper calibration, colors on the MacBook Air display will appear brighter and contrast will increase, making the display look significantly improved. Display calibration only takes a minute or two with “Expert Mode”, just be sure to calibrate colors in a neutrally lit environment with the brightness temporarily turned up to get the best results. 2: Maximize Screen Usage with Full Screen Apps & Dock Hiding Taking apps full screen makes the best of the smaller screen sizes of the MacBook Air, which is particularly important on the 11″ model, but still has nice benefits on the 13″ Air. Just toggling the Full Screen button in the corner of most apps is all it takes, or set a keyboard shortcut for this purpose if that's your preference. When not working full screen, having the Dock automatically hide itself is another great way to save some screen real estate. All that's necessary to achieve that is to hit Command+Option+D, and the Dock will automatically disappear and reappear again when you hover the cursor near it. Or you can toggle it yourself in the Dock settings. These are the two simplest tricks to get the best use of a smaller display, but we've covered more tips for being productive with small screens before if you're interested in some more advanced solutions. 3: Learn the 2 Simplest Tricks to Maximize Battery Life The MacBook Air gets stellar battery life on it's own, but to get the absolute most battery life out of your Air you'll want to focus on two things: Manage screen brightness at a reasonable level, the best battery life comes under 65% brightness Keep actively running applications to a minimum when aiming for battery longevity For best results, go with 50% (or less) screen brightness, and quit out of every single app that isn't necessary for the task at hand. A simple trick for the latter is to use a DIY quit-all function and then selectively launch a single app or two that is needed to get the job done, keeping background activity to a minimum. Want even better battery life? follow some other tips to further boost that battery, relevant to all MacBook's be them an Air, Pro, Retina, or whatever else you're rocking. And don't forget to upgrade to OS X Mavericks when possible, because it has some serious battery enhancing features. 4: Rely on Cheap External Storage for Media & Backups Perhaps the only weakness of the MacBook Air is the size of onboard SSD storage, which can be inadequate when compared to laptops that use old fashioned hard drives. Fortunately, cheap external storage is now the norm, and it's very easy to augment the lightning fast built-in drive with affordable and portable external solutions. Owners of the 13″ model should spend a bit to grab a sizable SD card with decent storage capacity, which tucks nicely into the card reader on the side and adds a lot of storage capacity for a tiny price tag, making it a great place to store media files, movies, photos, downloads, and other stuff that doesn't necessarily need to be on the primary drive. Unfortunately, 11″ Air owners don't get the SD card option, but an external micro USB Flash drive can make a decent compromise and still remain small enough to not be a nuisance even if it does stick out of a USB slot. Speaking of external storage, grab a large external portable drive and partition it to serve as both a general use media drive and Time Machine destination. This allows you to share a single drive for backups and file storage and avoid a tangle of cables whether you're on the go or at a desk.
ioreg -lw0 | grep IODisplayEDID | sed "/[^<]* If you see something prefixed with “LP” reported back, you have a display panel that should be manually calibrated to look it's best. Open System Preferences, found in the Apple menu, and choose “Displays” Choose the “Colors” tab and click “Calibrate”, then check the box for “Expert Mode” to get the best results The effect is very hard to demonstrate in screen shots because images don't carry display profiles, you really need to check this yourself and run through calibration (or use a pre-made Air color profile for LG displays) to see the remarkable difference that is possible. The gist is that after a proper calibration, colors on the MacBook Air display will appear brighter and contrast will increase, making the display look significantly improved. Display calibration only takes a minute or two with “Expert Mode”, just be sure to calibrate colors in a neutrally lit environment with the brightness temporarily turned up to get the best results. 2: Maximize Screen Usage with Full Screen Apps & Dock Hiding Taking apps full screen makes the best of the smaller screen sizes of the MacBook Air, which is particularly important on the 11″ model, but still has nice benefits on the 13″ Air. Just toggling the Full Screen button in the corner of most apps is all it takes, or set a keyboard shortcut for this purpose if that's your preference. When not working full screen, having the Dock automatically hide itself is another great way to save some screen real estate. All that's necessary to achieve that is to hit Command+Option+D, and the Dock will automatically disappear and reappear again when you hover the cursor near it. Or you can toggle it yourself in the Dock settings. These are the two simplest tricks to get the best use of a smaller display, but we've covered more tips for being productive with small screens before if you're interested in some more advanced solutions. 3: Learn the 2 Simplest Tricks to Maximize Battery Life The MacBook Air gets stellar battery life on it's own, but to get the absolute most battery life out of your Air you'll want to focus on two things: Manage screen brightness at a reasonable level, the best battery life comes under 65% brightness Keep actively running applications to a minimum when aiming for battery longevity For best results, go with 50% (or less) screen brightness, and quit out of every single app that isn't necessary for the task at hand. A simple trick for the latter is to use a DIY quit-all function and then selectively launch a single app or two that is needed to get the job done, keeping background activity to a minimum. Want even better battery life? follow some other tips to further boost that battery, relevant to all MacBook's be them an Air, Pro, Retina, or whatever else you're rocking. And don't forget to upgrade to OS X Mavericks when possible, because it has some serious battery enhancing features. 4: Rely on Cheap External Storage for Media & Backups Perhaps the only weakness of the MacBook Air is the size of onboard SSD storage, which can be inadequate when compared to laptops that use old fashioned hard drives. Fortunately, cheap external storage is now the norm, and it's very easy to augment the lightning fast built-in drive with affordable and portable external solutions. Owners of the 13″ model should spend a bit to grab a sizable SD card with decent storage capacity, which tucks nicely into the card reader on the side and adds a lot of storage capacity for a tiny price tag, making it a great place to store media files, movies, photos, downloads, and other stuff that doesn't necessarily need to be on the primary drive. Unfortunately, 11″ Air owners don't get the SD card option, but an external micro USB Flash drive can make a decent compromise and still remain small enough to not be a nuisance even if it does stick out of a USB slot. Speaking of external storage, grab a large external portable drive and partition it to serve as both a general use media drive and Time Machine destination. This allows you to share a single drive for backups and file storage and avoid a tangle of cables whether you're on the go or at a desk.
ioreg -lw0 | grep IODisplayEDID | sed "/[^<]* If you see something prefixed with “LP” reported back, you have a display panel that should be manually calibrated to look it's best. Open System Preferences, found in the Apple menu, and choose “Displays” Choose the “Colors” tab and click “Calibrate”, then check the box for “Expert Mode” to get the best results The effect is very hard to demonstrate in screen shots because images don't carry display profiles, you really need to check this yourself and run through calibration (or use a pre-made Air color profile for LG displays) to see the remarkable difference that is possible. The gist is that after a proper calibration, colors on the MacBook Air display will appear brighter and contrast will increase, making the display look significantly improved. Display calibration only takes a minute or two with “Expert Mode”, just be sure to calibrate colors in a neutrally lit environment with the brightness temporarily turned up to get the best results. 2: Maximize Screen Usage with Full Screen Apps & Dock Hiding Taking apps full screen makes the best of the smaller screen sizes of the MacBook Air, which is particularly important on the 11″ model, but still has nice benefits on the 13″ Air. Just toggling the Full Screen button in the corner of most apps is all it takes, or set a keyboard shortcut for this purpose if that's your preference. When not working full screen, having the Dock automatically hide itself is another great way to save some screen real estate. All that's necessary to achieve that is to hit Command+Option+D, and the Dock will automatically disappear and reappear again when you hover the cursor near it. Or you can toggle it yourself in the Dock settings. These are the two simplest tricks to get the best use of a smaller display, but we've covered more tips for being productive with small screens before if you're interested in some more advanced solutions. 3: Learn the 2 Simplest Tricks to Maximize Battery Life The MacBook Air gets stellar battery life on it's own, but to get the absolute most battery life out of your Air you'll want to focus on two things: Manage screen brightness at a reasonable level, the best battery life comes under 65% brightness Keep actively running applications to a minimum when aiming for battery longevity For best results, go with 50% (or less) screen brightness, and quit out of every single app that isn't necessary for the task at hand. A simple trick for the latter is to use a DIY quit-all function and then selectively launch a single app or two that is needed to get the job done, keeping background activity to a minimum. Want even better battery life? follow some other tips to further boost that battery, relevant to all MacBook's be them an Air, Pro, Retina, or whatever else you're rocking. And don't forget to upgrade to OS X Mavericks when possible, because it has some serious battery enhancing features. 4: Rely on Cheap External Storage for Media & Backups Perhaps the only weakness of the MacBook Air is the size of onboard SSD storage, which can be inadequate when compared to laptops that use old fashioned hard drives. Fortunately, cheap external storage is now the norm, and it's very easy to augment the lightning fast built-in drive with affordable and portable external solutions. Owners of the 13″ model should spend a bit to grab a sizable SD card with decent storage capacity, which tucks nicely into the card reader on the side and adds a lot of storage capacity for a tiny price tag, making it a great place to store media files, movies, photos, downloads, and other stuff that doesn't necessarily need to be on the primary drive. Unfortunately, 11″ Air owners don't get the SD card option, but an external micro USB Flash drive can make a decent compromise and still remain small enough to not be a nuisance even if it does stick out of a USB slot. Speaking of external storage, grab a large external portable drive and partition it to serve as both a general use media drive and Time Machine destination. This allows you to share a single drive for backups and file storage and avoid a tangle of cables whether you're on the go or at a desk.


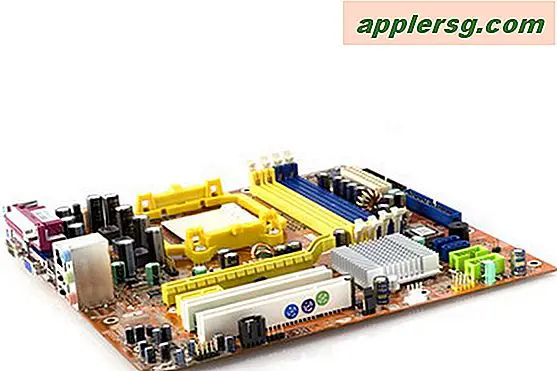


![Rara intervista di 50 minuti con Steve Jobs del 1990 [Video]](http://applersg.com/img/fun/598/rare-50-minute-interview-with-steve-jobs-from-1990.jpg)